Forms let you collect information from your visitors — email sign-ups, feedback, applications, RSVPs, or any other data you need. Forms are available on all plans.
Where forms appear
The same form builder powers three different things on your profile:
- Form blocks — Drop a form anywhere on your page as a regular block.
- Subscribe blocks — Turn on Collect subscribers in any form with an Email field and submissions are added to your subscriber list. The Collect Emails block is a one-click shortcut for this.
- Gates — Use a form to protect a link or a whole page behind a password, email signup, confirmation, or custom set of questions.
Anything you can build in the form builder works in any of these places.
The Forms panel
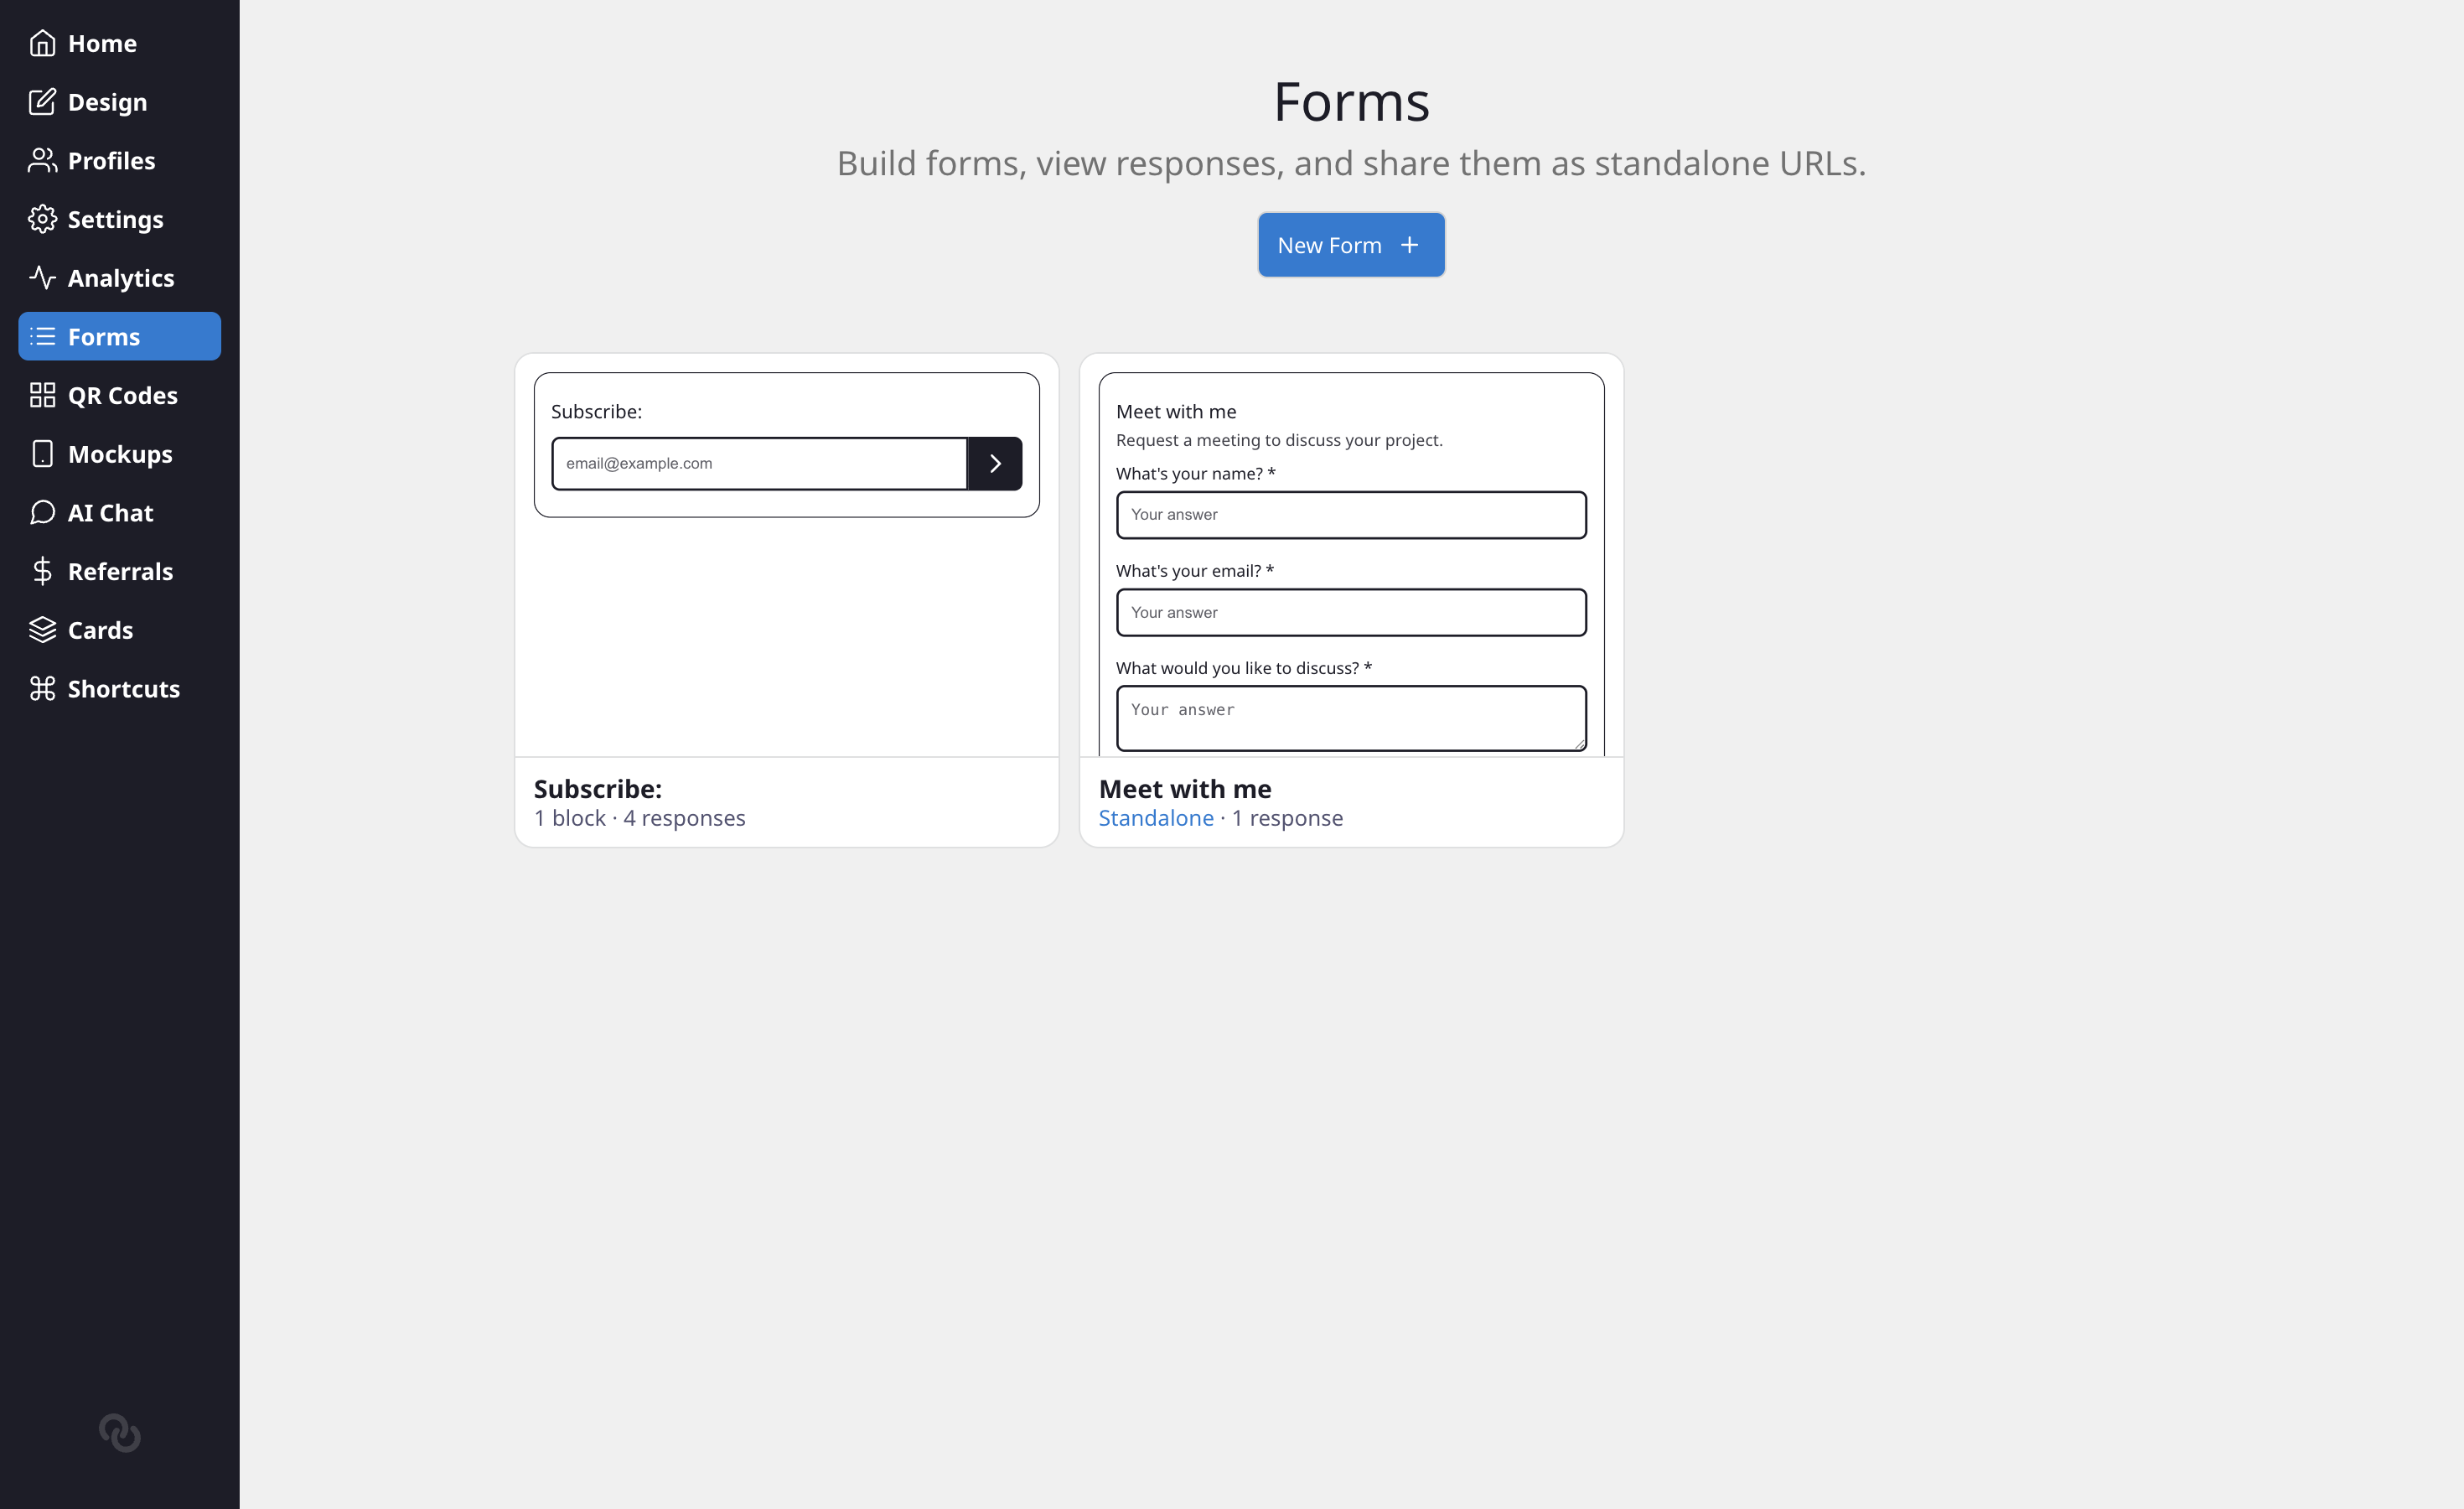
Forms have their own top-level panel in the admin sidebar (between Analytics and QR Codes). From the Forms panel you can see all your forms in one place, create new ones, view responses, copy share URLs, export data, and delete forms you no longer need.
How to create a form
There are two ways to create a form:
From the Forms panel
- Click Forms in the left sidebar.
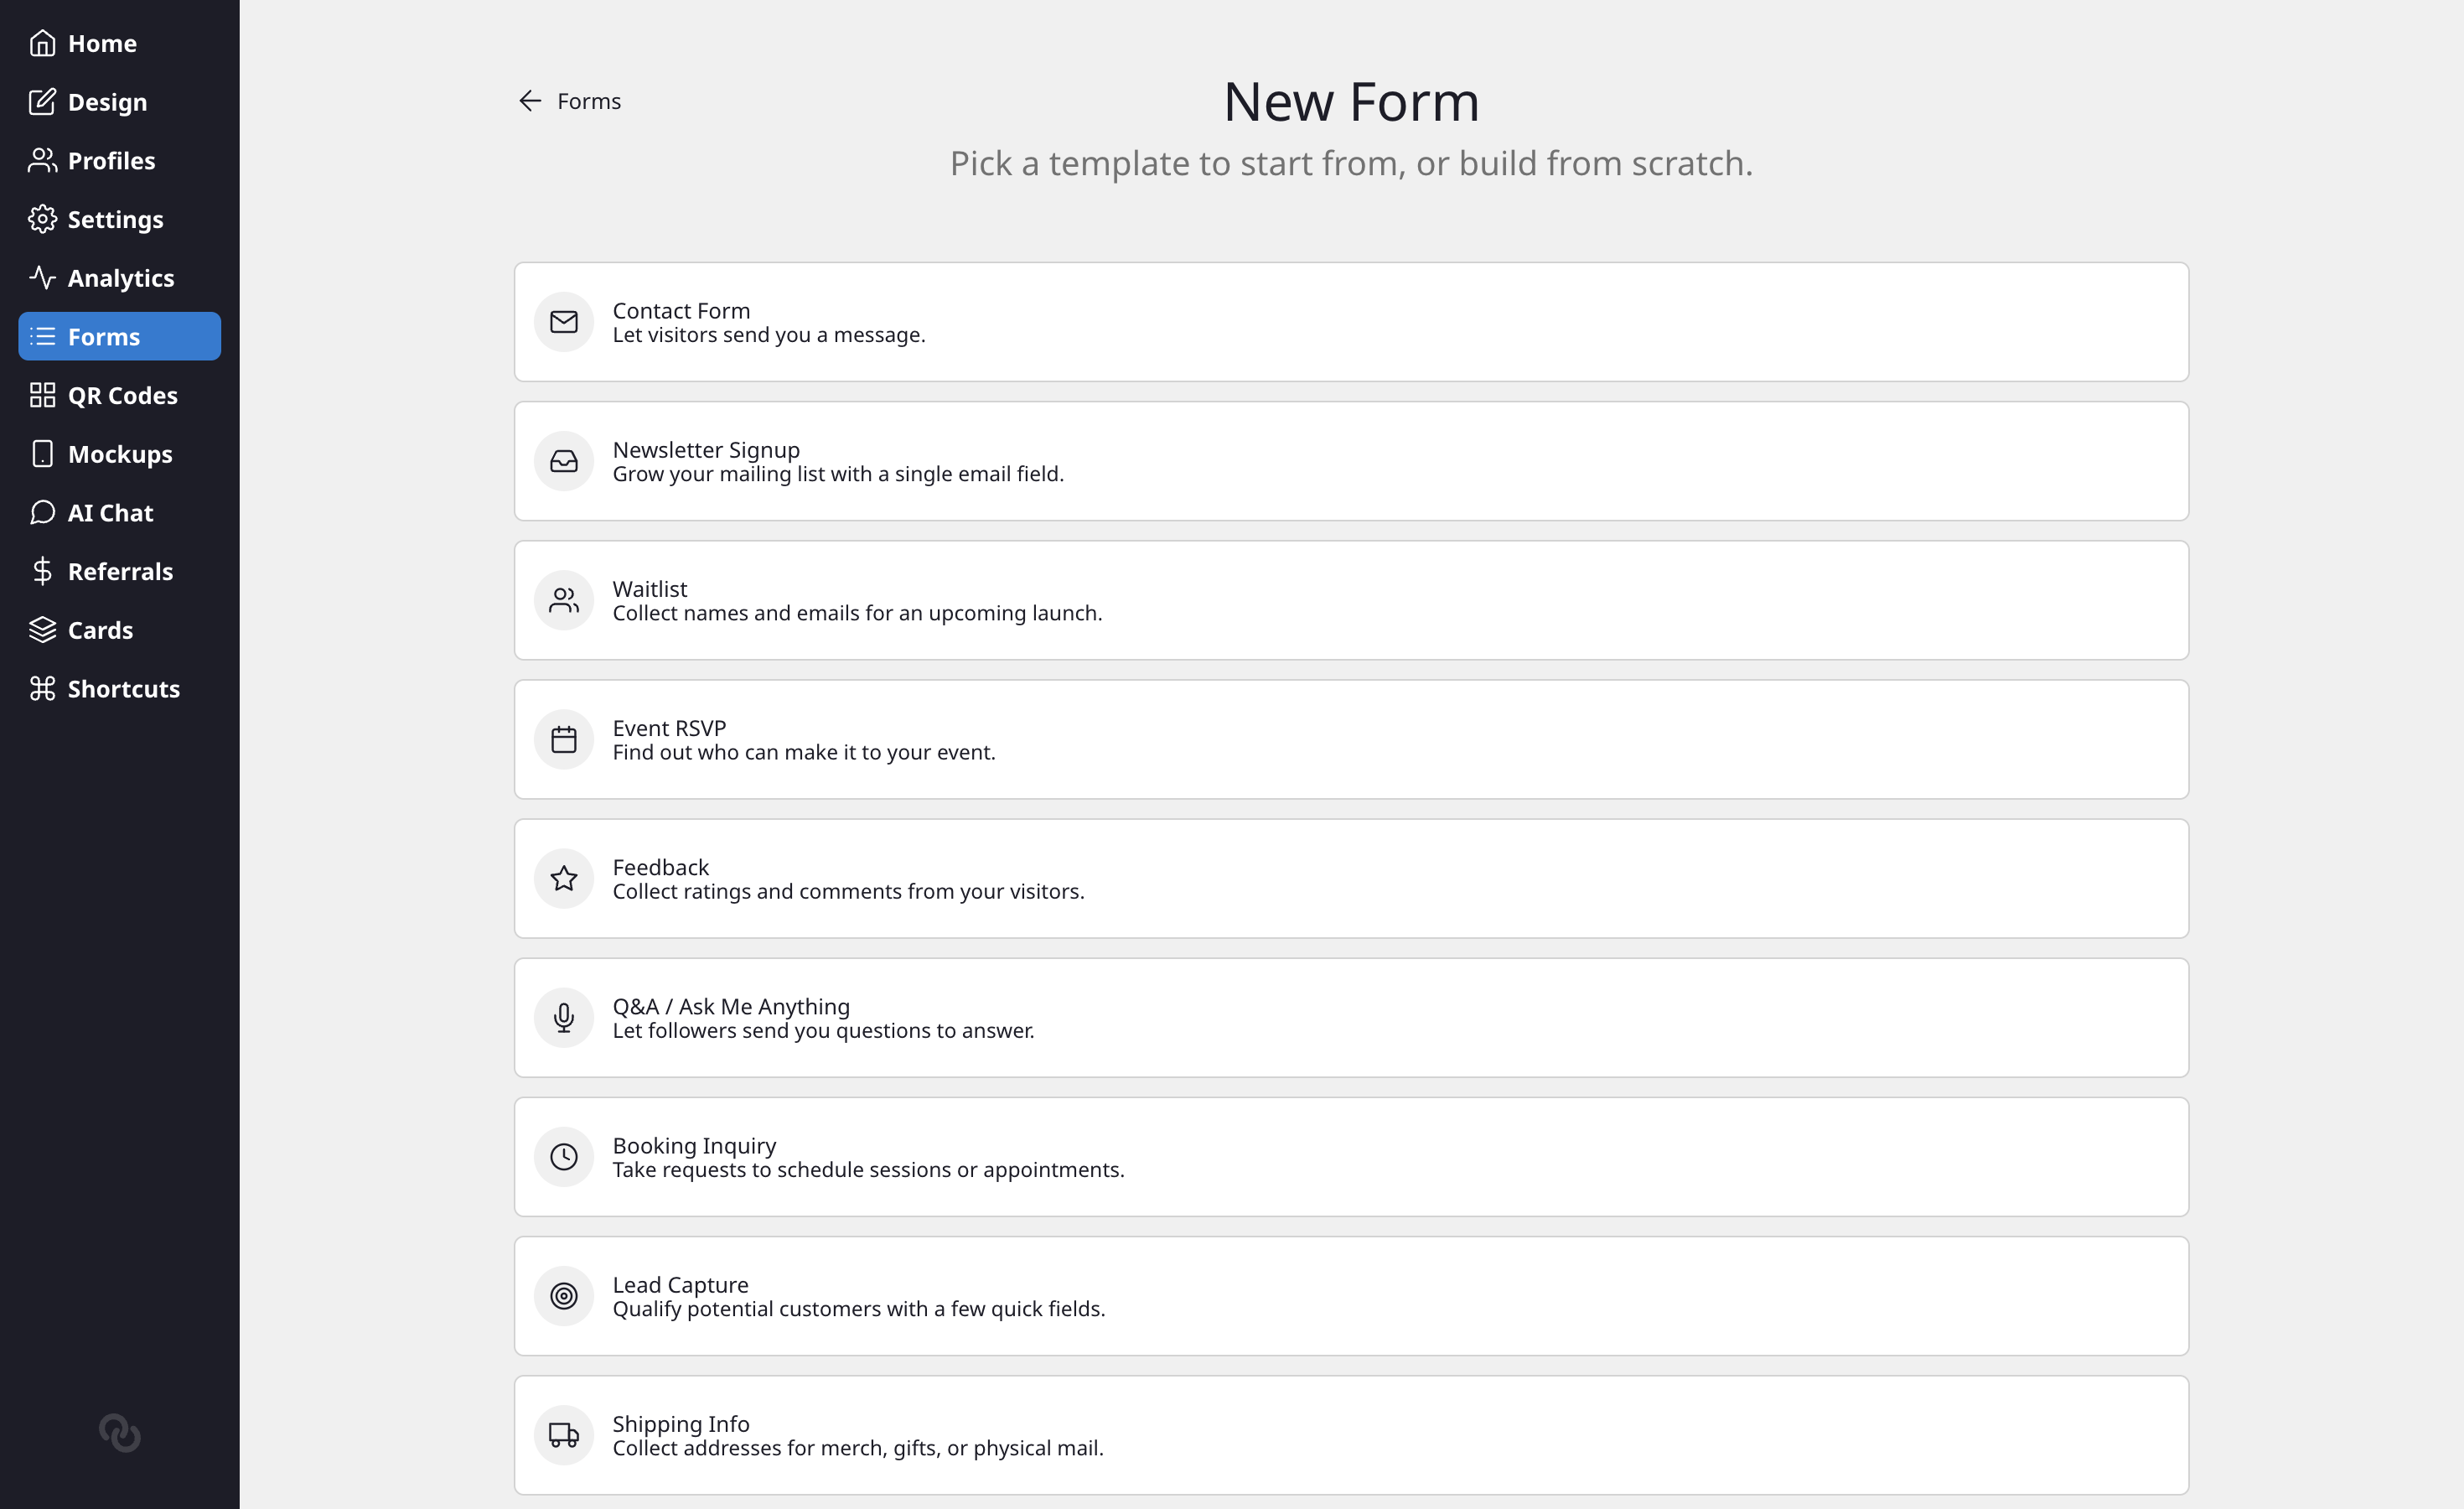
- Click New Form. This opens a full-page builder.
- Pick a starter template or choose Blank to start from scratch.
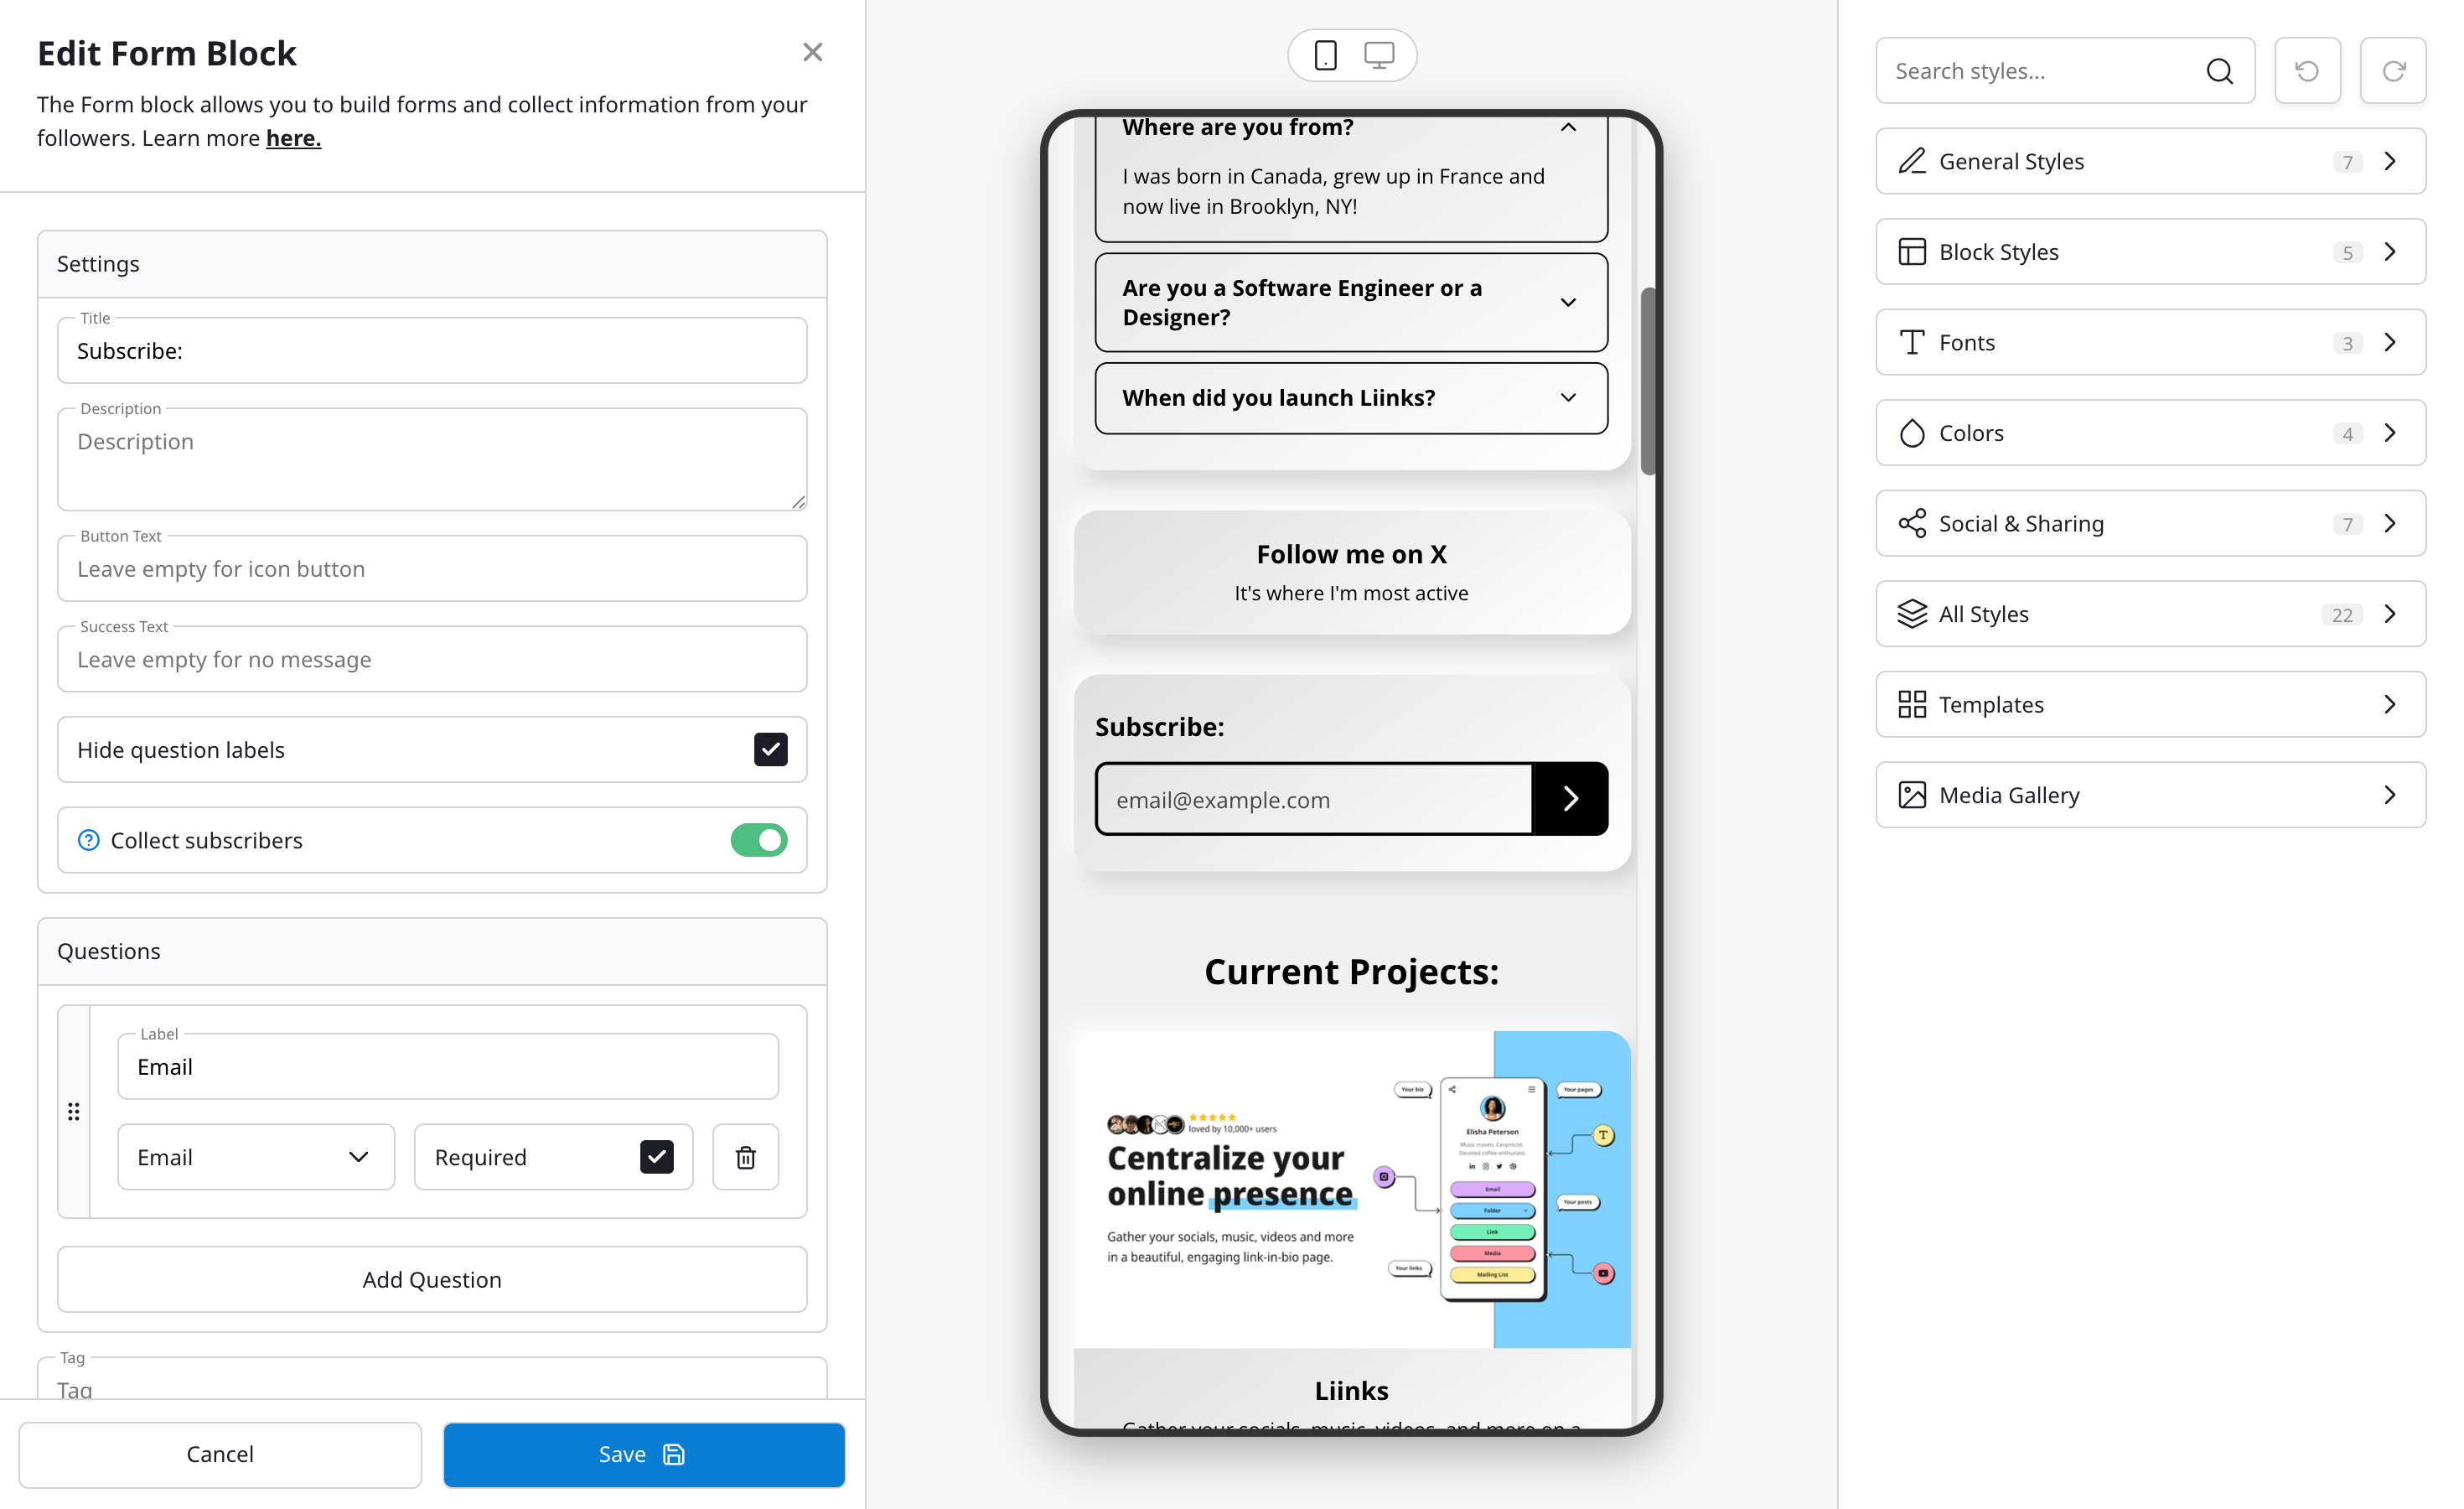
- Customize your fields, title, and settings in the builder. A live preview updates as you edit.
- Click Create when you're happy with the form.
From a link block
- Click the Add Block button on your profile editor.
- Select Form from the block type list (under Content), or pick Collect Emails (under Engagement) for a ready-made email sign-up form.
- If you already have forms, you can pick an existing one to attach. Otherwise, choose a template to create a new form.
Form templates
When creating a new form, you can start from one of these templates:
- Contact Form — Name, email, and message fields.
- Newsletter Signup — A single email field with subscriber mode enabled.
- Waitlist — Name and email for pre-launch signups.
- Event RSVP — Name, email, and attendance dropdown.
- Feedback — A star rating and comments field.
- Q&A / Ask Me Anything — A question field and optional name.
- Booking Inquiry — Name, email, preferred date, and notes.
- Lead Capture — Name, email, company, and a message field.
- Shipping Info — Name, email, phone, and a full address field.
- Blank — Start from scratch with no pre-filled fields.
Templates give you a head start; you can add, remove, or reorder fields after picking one.
Form settings
- Title — The heading displayed at the top of your form.
- Description — Optional instructions or context for your visitors.
- Button Text — The text on the submit button (default: "Submit").
- Success Message — The message shown after a visitor submits the form (default: "Thank you!").
- Hide Labels — Toggle this on to hide field labels, showing only placeholder text inside each input. Useful for compact, single-field forms like email sign-ups.
Collecting subscribers
If your form includes an Email field, a Collect subscribers toggle appears in the form builder. When enabled, every email submitted through the form is automatically added to your subscriber list (viewable on the Audience page in the sidebar — see View and manage your audience).
This is the recommended way to collect email sign-ups on your page. The Collect Emails template in the Add Block modal creates a single-field email form with this toggle already enabled.
If you have Mailchimp connected, subscriber-mode submissions are synced to your Mailchimp list automatically. See Connecting to Mailchimp for setup instructions.
Field types
Each form can have multiple fields. The following types are available:
Text inputs
- Short Text — A single-line text input. Good for names or brief responses.
- Long Text — A multi-line text area. Good for comments, feedback, or detailed answers.
Validated inputs
- Email — A text field that validates email addresses.
- Phone — A text field for phone numbers.
- URL — A text field that validates web addresses.
- Number — A numeric input field.
Choice inputs
- Dropdown — A select menu with predefined options. Visitors pick one.
- Checkbox — A list of options where visitors can select multiple.
- Radio — A list of options where visitors pick exactly one.
For Dropdown, Checkbox, and Radio types, you provide the choices (minimum 2 options) when building your form.
Date and time
- Date — A date picker.
- Time — A time picker.
- Date & Time — A combined date and time picker.
Address
- Address — A structured address input with fields for street, city, state/region, postal code, and country. The country dropdown lists all ISO 3166 countries with US, CA, GB, and AU pinned at the top for quick access.
Other
- Rating — A 5-star rating input.
Building your form
- Click Add Field to add new fields to your form.
- Set the label (what visitors will see).
- Choose the field type from the options above.
- Mark fields as required if they must be answered before submitting.
- Drag fields to reorder them.
- At least one field must be marked as required.
Viewing responses
Form responses are available in the Forms panel:
- Click Forms in the left sidebar.
- You'll see a list of all your forms with response counts and the date of the last response.
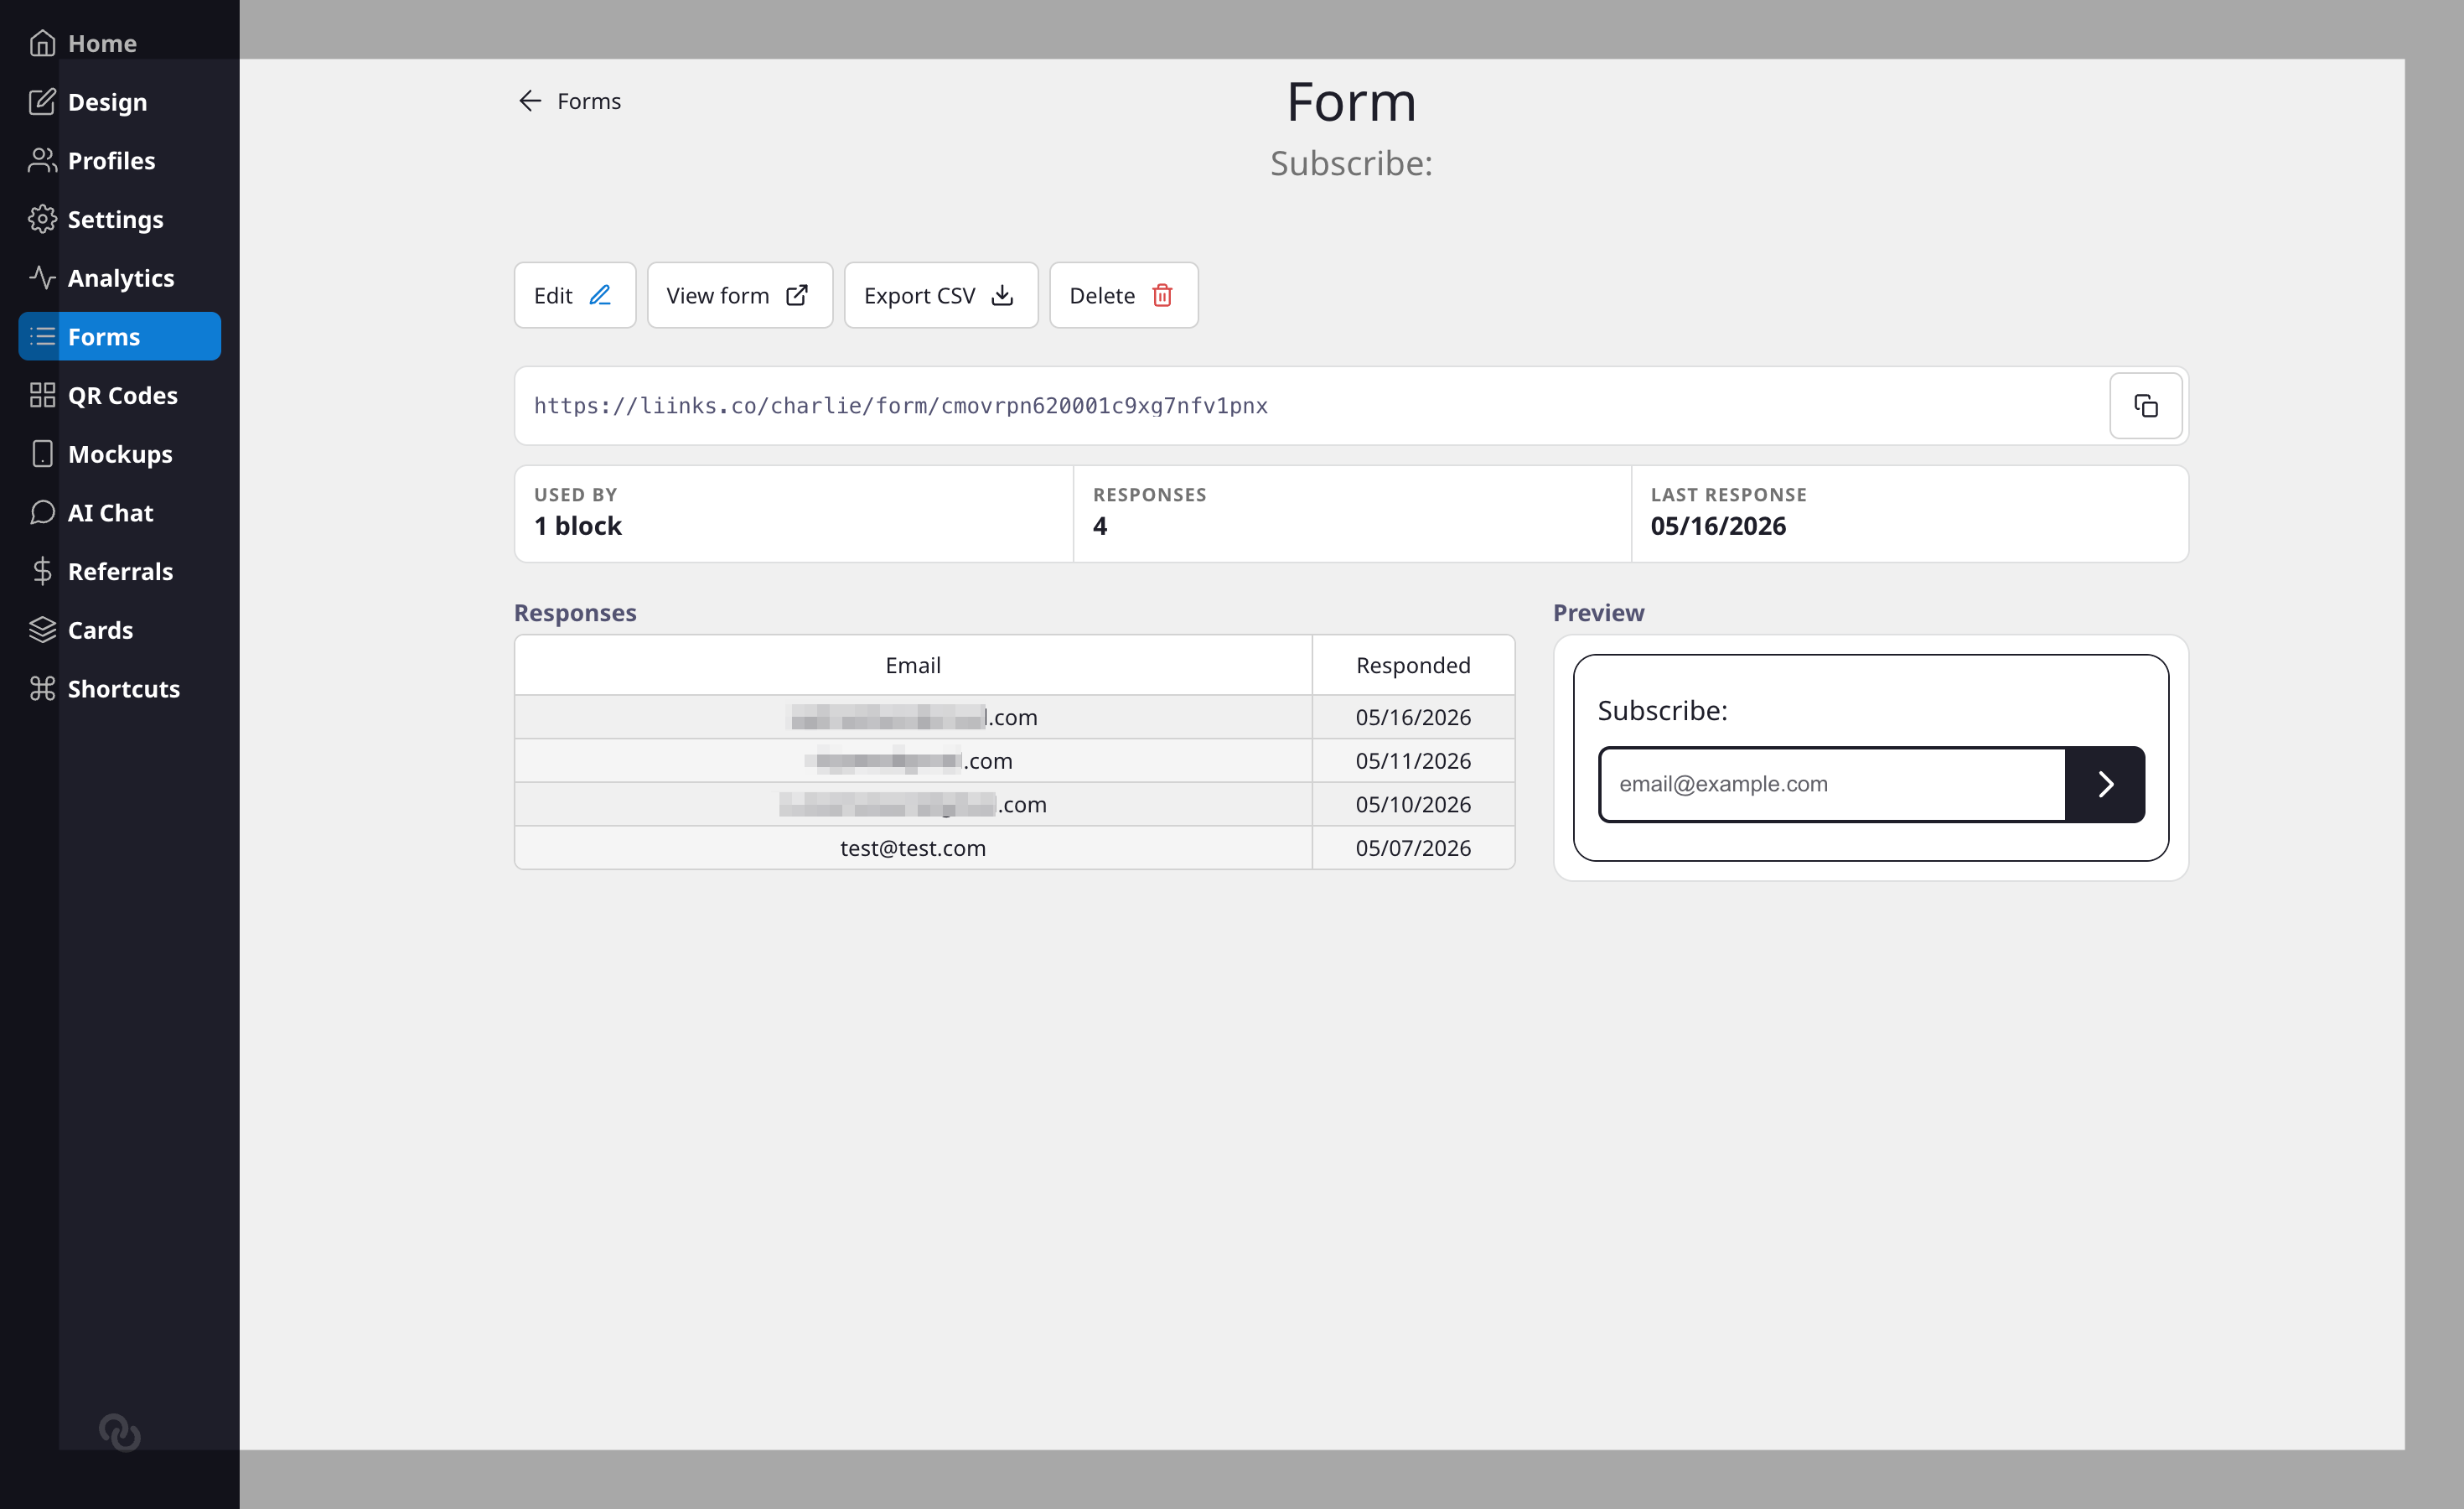
- Click on a form to open the detail view. On desktop, you'll see a live preview of the form on the left and responses on the right.
- Use the action bar at the top to Edit, Copy share URL, Export CSV, or Delete the form.
You can also export responses as CSV from the form detail view for use in spreadsheets or other tools.
Standalone form URLs
Every form has its own shareable URL at liinks.co/yourname/form/formId. You can share this link directly so visitors can fill out the form without visiting your full profile page. The form inherits your page's design theme.
Notifications
You'll receive a notification when someone submits a response to your form, so you can follow up promptly. The notification email lays out each answer in a clean card, with the field label above its value, so you can scan the details at a glance. For subscriber-mode forms, the new subscriber's email appears right in the opening line, with any extra fields (such as their name) shown in the card below.
Every response is also saved to your Audience, where you can review a contact's full history any time.